How to enable VT (Virtualization Technology) to get better performance
Virtualization technology could improve the performance of your computer and allow NOX APP Player to run more smoothly and faster.
1. Does your computer supports Virtualization (aka. VT-x, Virtual Technology)?
To check if your computer supports VT, you could refer to this useful too called: LeoMoon CPU-V. It does not only detect if your CPU supports Hardware Virtualization, but also Detect if Hardware Virtualization is Enabled in BIOS.
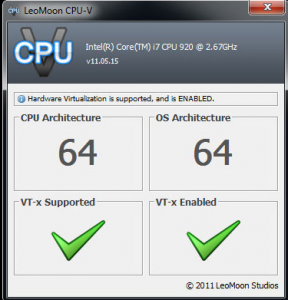
If your check result shows a green check under VT-x Supported, it means your computer supports virtualization. If it’s a red cross, then your computer does not support VT, but you could still install MuMu Player as long as you meet the installation requirements.
If your check result shows a green check under VT-x Enabled, then it means VT is already enabled in your BIOS. If it’s a red cross, then follow the below steps to enable it.
2.Find out your BIOS type: Press Win+R to open the “Run” box, input “Dxdiag” and click “OK”. Then you will see your BIOS information as shown in the below screenshot.
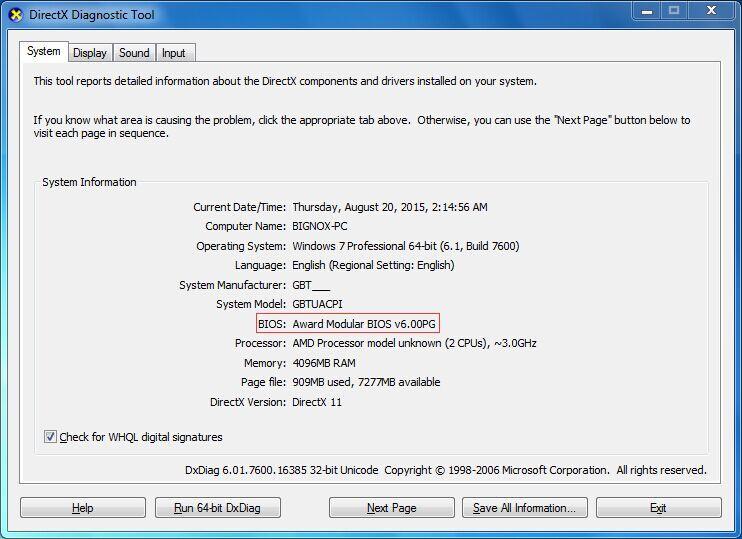
3. Then google for this particular BIOS what the steps are to enable VT. Usually enter BIOS requires pressing a designated key repeatedly when your computer is booting up. The designated key could be any of the function key or ESC key depends on your computer’s brand. Once you enter the BIOS mode, look for Virtualization, VT-x, Intel Virtual Technology or anything that says “Virtual” and enable it. Once done, turn off your computer completely then turn it back on. Now Virtualization is enabled and the performance of MuMu Player is even better.
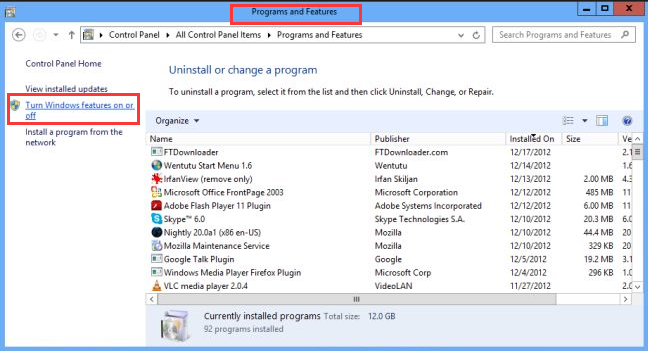
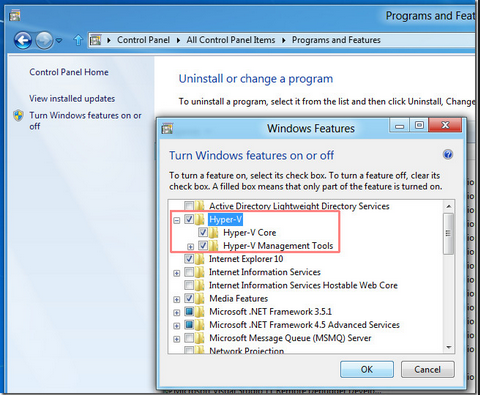
Note 1: If you are running Windows 8 or Windows 10, there might be conflicts between VT and Microsoft Hyper-V technology. Please turn Hyper-V off following these steps: go to Control Panel->Programs and Features->Turn Windows features on or off->un-tick the box before Hyper-V.
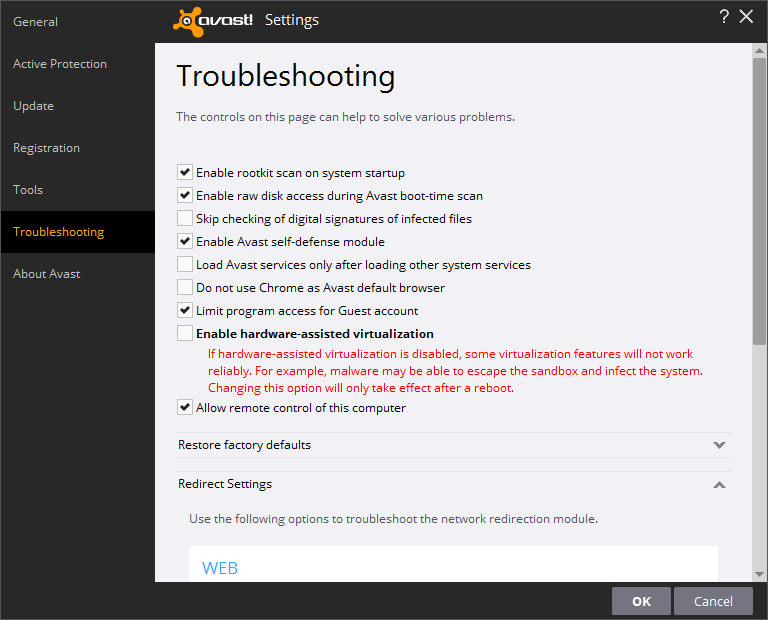
Note 2: If your VT is enabled in BIOS, but the LeMoon check result still shows a red cross under VT-x Enabled, it’s highly possible that your anti-virus software has blocked this function. Taking Avast! for example, to fix this problem:
1) Open Avast anti-virus >> Settings >> Troubleshooting
2) Uncheck the Enable hardware-assisted virtualization, then reboot your computer
